RightFields Plugin for Movable Type
Current version: 1.21 (8/8/07)
- Download (.tar.gz file)
- About the RightFields Plugin
- Installing RightFields
- Accessing the RightFields Interface
- Default Settings
- Deleting Settings
- Configuring Standard Fields
- Configuring Extra Fields
- Disabling and Selectively Enabling RightFields
- Field Types
- Defining Default Values
- Defining Custom Template Tags
- Configuring the Entry Listing
- Plugin Template Tags
- Version History
About the RightFields Plugin
If you use Movable Type to manage content other than a traditional weblog, or if your weblog entries contain specific types of structured data, chances are you've wished for the ability to change the labels of the fields on the entry editing screen, or to make one of them into a menu or checkbox, or to add more fields.
That's what RightFields lets you do. You can change the label and input type of the standard entry fields, and create extra fields. If you have multiple weblogs with different types of content, you can define a separate set of fields for each weblog.
In addition to the standard form input types, RightFields has a File type that lets you upload a file directly from the entry screen; a Date type that lets you select a year, month, and day from menus; and a powerful Linked entry feature that lets you associate an entry with an entry from another weblog, or a different entry in the same weblog.
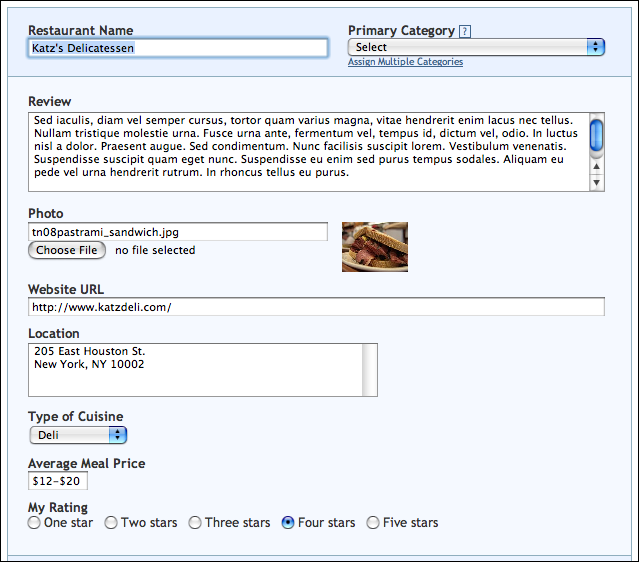
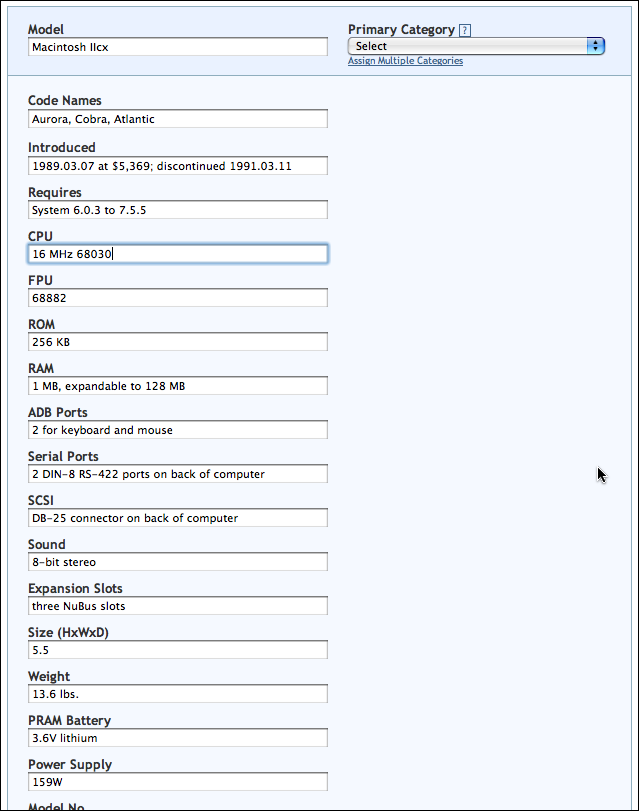
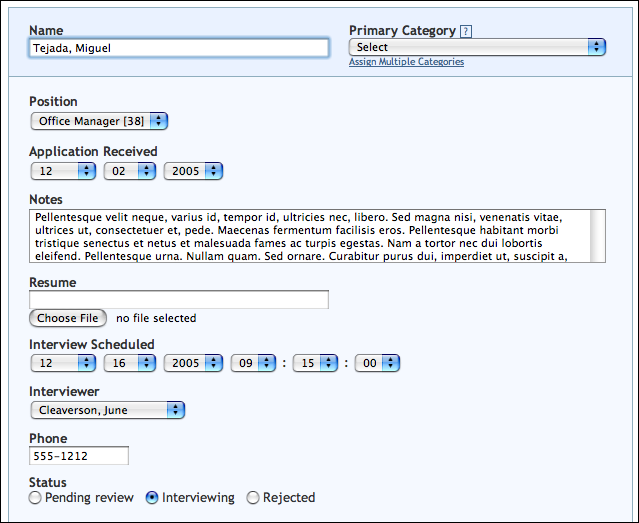
Do you write restaurant reviews on your weblog? Do you publish an MT-driven database of old computer models? Does your company use MT on its intranet to track job applicants? Here are three entry editing screens after a few minutes of customization with RightFields:
Requirements
RightFields requires Movable Type 3.3.
If you want to use SQL data storage, you'll need access to create SQL tables in the database where MT keeps its data, either through the command line or through PHPMyAdmin or a similar tool provided by your web host.
Terms of Use
RightFields is copyright 2002-2007 Kevin Shay, and may not be redistributed without permission of the author.
RightFields is provided "as is" and without warranty of any kind.
RightFields is shareware. The downloadable version is fully functional. You may download it, install it, and try it out for a reasonable evaluation period. If, after that period, you wish to continue to use it, you are expected to pay a shareware fee of $15 for personal use, $30 for education or not-for-profit use, or $50 for commercial use, on a single installation of Movable Type. I will give priority to support requests from paid users on the forums, but paying the fee does not entitle you to support.
MT::Object::Pseudo is copyright 2004-2005 Appnel Internet Solutions LLC, Timothy Appnel, tim [AT] appnel [DOT] com. Redistributed with permission of the author.
The code for the JavaScript popup calendar used for Date fields is by Matt Kruse.
Support
Please use the support forums for all support requests, bug reports, feature requests, questions, and comments regarding this plugin.
Special Thanks
To Tim Appnel for the Pseudo module; to Chad Everett, Patrick Taylor, Komra Moriko, Marvin Hutchens, and Aziz Ashofte for early testing and suggestions; to Chris Jernigan and to Tim Murtaugh and ScienceBlogs for subsidizing the development of certain features; and to Dan Wolfgang for the Date field calendar icon.
Installing RightFields
To install RightFields, download RightFields.tar.gz and decompress it on your hard drive. This will result in a directory called RightFields-[version]. The directories within this correspond to directories in the MT directory on your server.
Open the plugins directory. Upload the entire RightFields directory to the plugins directory on your server.
Open the mt-static/plugins directory. Upload the entire RightFields directory to the mt-static/plugins directory on your server. (You can skip this step if you know you will never be using Date fields; the directory contains the code and icon for a popup calendar.)
If you're using dynamic publishing, open the php/plugins directory. Upload all the files in that directory to the php/plugins directory on your server.
Finally, change the permissions on the file plugins/RightFields/mt-rightfields.cgi to 755 to make this script executable.
If you're going to be converting from PluginData to SQL, change the permissions on /plugins/RightFields/mt-rf-convert.cgi as well.
Accessing the RightFields Interface
You need to be logged in to Movable Type to access RightFields. If you're not logged in, you'll see the standard login screen. Enter your username and password to proceed.
To configure the fields for a given weblog, you need to have Blog Administrator permission for that weblog. To configure the Default Settings, you need to have System Administrator permission.
There are two ways to get to the RightFields configuration screens from within Movable Type.
- In the Plugins listing under System Overview, there should be a listing for RightFields.
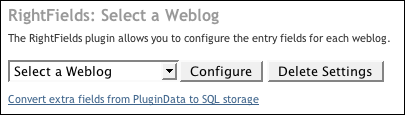
Click on the name of the plugin or the Run RightFields link. You'll see a page with a menu of weblogs for which you are a Blog Administrator. Select a weblog and click the Configure button to go to the RightFields settings for the weblog. (If you are a System Administrator, you'll also see a Default Settings item. Select this item and click the Configure button to go to the Default Settings for RightFields for the whole system.)

- When RightFields is installed and you're creating or editing an entry in a weblog for which you are a Blog Administrator, at the bottom of the page, below the standard Customize the display of this page link, you'll see links to the RightFields settings.
Click on Standard Fields or Extra Fields to go directly to those settings for this weblog.

Default Settings
In addition to configuring settings for a specific weblog, you can configure the Default Settings for Standard Fields, Extra Fields, or Template Tags for the whole system. These will apply to any weblog that does not have its own specific settings.
If you have defined Default Settings of a given type, and you try to configure settings of that type for a specific weblog, you run the risk of losing any data that was already stored with the Default Settings in place. Because of this, RightFields will display a warning and require you to explicitly override the Default Settings.

Note that you can override the different types of settings separately; that is, you could have weblog-specific Standard Field customizations for a weblog, but use the Default Settings for Extra Fields to apply a set of extra fields to the same weblog.
If you have weblog-specific settings defined for a given weblog and wish to use the Default Settings for that weblog instead, simply delete the weblog's settings.
Deleting Settings

To delete the RightFields settings for a particular weblog, or the Default Settings, select the weblog or Default Settings from the menu of weblogs and click the Delete Settings button.
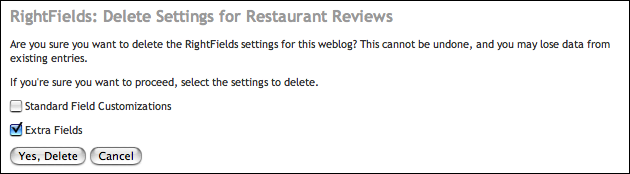
RightFields will display a confirmation screen with a checkbox for each type of settings currently defined for the weblog (or Default Settings). Check the type(s) of settings you want to delete, and click the Yes, Delete button.
Note that deleting Extra Fields settings will not immediately delete or alter data store in extra fields for existing entries. The data for a given entry will not be affected until the entry is edited and re-saved. This means that if you accidentally delete your settings, you can simply re-define the settings before editing any entries and the data should still be there.
Configuring Standard Fields
The Standard Fields tab for a particular weblog lists the five standard Movable Type entry fields: Title, Entry Body, Extended Entry, Excerpt, and Keywords.
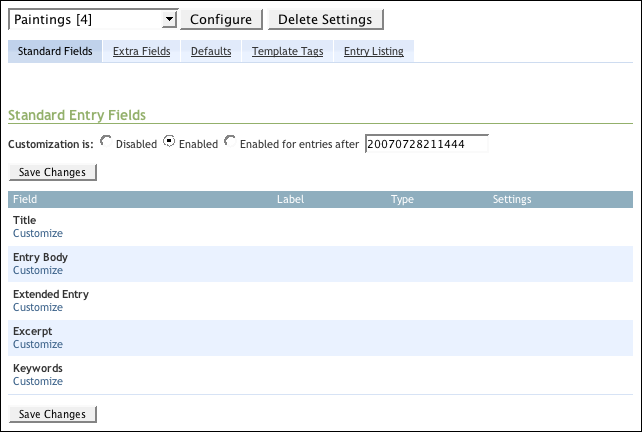
Initially, each field has a Configure link below it. When you click on this, options for customizing the field will appear.

When a field is customized, the Configure link becomes a Default link. Click on this to "de-customize" the field: MT will once again display the standard field label and text field on the entry editing screen. (RightFields will still store the settings you entered for the field, in case you later decide to customize the field again.)
The Label field lets you set the text that will be displayed above the field on the entry editing screen. You can also display this text on a publishing template with the MTFieldLabel tag.
The Type menu lets you set the input type of the field. The Settings column lets you control various options for how the field will look and behave, depending on what field type you choose. The individual types and their settings are described in detail below in the Field Types section.
Configuring Extra Fields
The Extra Fields tab for a particular weblog lets you define additional fields that will appear when creating or editing an entry in the weblog.
Before you define the fields and their settings, you need to specify how you want RightFields to store the data entered into the extra fields.
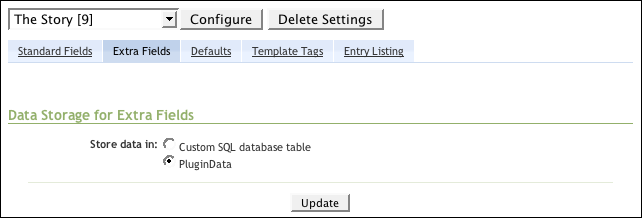
By default, the PluginData option is selected, meaning that RightFields will store the data in MT's own database. This does not require any additional work on your part.
If you select the Custom SQL database table option, you'll need to have created a separate table in the database, with the table and its columns named as described below.
While the PluginData method is easier to get running, the way the data is stored makes it less flexible. This means that the MTLinkingEntries tag, and certain other features planned for future versions of RightFields, will only work if SQL data storage is used. SQL data storage is the preferred method, and if you have the technical knowledge and access to create a table in your database, you should use this option, especially if you're going to be working with a large amount of data.
Click Update to save your data storage settings and start defining your extra fields. Once you've saved the settings, the buttons under Data Storage for Extra Fields will be disabled, and a lock icon will appear.

Click the lock icon to enable the fields and change the data storage settings. Changing these settings can result in the data stored in extra fields being lost, so this is a precaution to help prevent unintentional changes. (If you do make an unwanted change to the settings, the data will not be lost immediately, but when you edit and save entries. You can restore the settings before editing any entries and your data should be fine.)
The field listing under Extra Entry Fields works somewhat differently depending on which data storage method you've selected. These specifics are covered below. The Sort, Label, Type, and Settings columns work the same way for both data storage methods.
The Sort column lets you set the order in which the extra fields will appear on the entry editing screen. To re-order the fields, adjust the numbers in the Sort fields and click Save Changes. This sort order also applies to looping through the fields with MTExtraFieldsLoop.
The Label field lets you set the text that will be displayed above the field on the entry editing screen. You can also display this text on a publishing template with the MTFieldLabel tag.
The Type menu lets you set the input type of the field. The Settings column lets you control various options for how the field will look and behave, depending on what field type you choose.
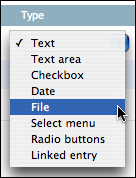
The individual types and their settings are described in detail below in the Field Types section.
PluginData Data Storage
When you select the PluginData storage method, RightFields will display three new fields under Extra Entry Fields. Enter a name for one of the fields to display settings for the field.
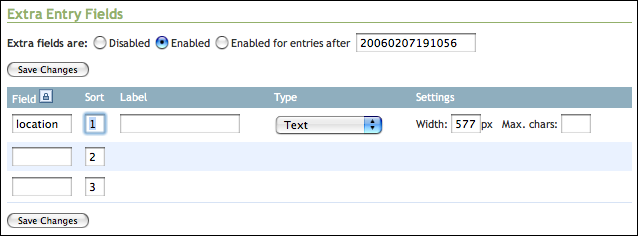
Three new fields will always appear at the end of the list, so to define more than three, simply enter them three at a time and save your changes to get three more.
The name of a field (as opposed to its label) is used internally by RightFields in storing the settings and data, and it's what you'll pass to template tags to display the field. The name should be fairly short, and cannot contain any spaces or any punctuation other than underscores. It's recommended that you make the names all lowercase.
Once you've entered a field name and saved the settings, you won't be able to edit the name unless you click the lock icon in the Field column header. Changing a field name can result in the data stored in extra fields being lost, so this is a precaution to help prevent unintentional changes. (If you do change a field name, the data will not be lost immediately, but when you edit and save entries. You can restore the name before editing any entries and your data should be fine.)
None of these restrictions apply to field labels, which can contain any characters you want and can be changed at any point with no problem.
To delete a field, simply click the lock icon to unlock the field names, then delete the field's name and click Save Changes. The field will be removed from the list.
SQL Data Storage
To have RightFields store the data entered into extra fields in an SQL table, you have to create the table in your MT database, and the table and its columns must be named properly, as follows.
First, choose a fairly short, distinctive name that describes the data you're storing. Let's call it datasource. In that case:
- The table should be named
mt_datasource - The table should have an integer column named
datasource_id, which should be indexed - Each additional column name should have the prefix
datasource_
You cannot choose a name that will cause your table name to conflict with one of MT's existing tables.
As an example, let's say you have a weblog of restaurant reviews. You want to store custom data about each restaurant such as its location, cuisine, average meal price, and a numeric rating. Your table definition statement would look something like this:
CREATE TABLE mt_restaurant (
    restaurant_id INTEGER NOT NULL,
    restaurant_location VARCHAR(100),
    restaurant_cuisine VARCHAR(40),
    restaurant_price VARCHAR(20),
    restaurant_rating TINYINT,
    INDEX(restaurant_id)
);
Important: Except for the _id column, all your other columns must allow NULL values. If you're using a tool like phpMyAdmin to define your table, it may default all the columns to "not null." This will prevent the data you enter in your extra fields from getting saved unless you fill in every one of the fields. A future version of RightFields will include data validation so you can make certain fields required; for now, they all have to allow blank values.
Note that you can use a single table to store data for more than one weblog. For example, you might define a generic table called mt_extra with columns called extra_col1, extra_col2, etc., and use it to store restaurant review data for one weblog and album review data for another weblog.
Once your table is created, you can tell RightFields to use it. When you select the Custom SQL database table option under Data Storage for Extra Fields, a SQL table field will appear.
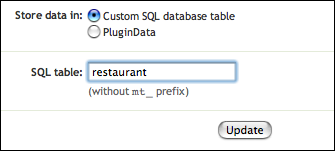
Enter the name of the table, minus the mt_ prefix (in the above example, you'd enter restaurant) and click Update. If the table is defined properly, RightFields will display field settings for each column in the table (minus the _id column).
If you alter the table definition in the database, when you return to RightFields, the field listing should reflect the changes.
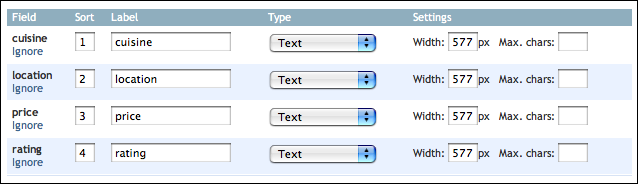
Initially, the label for each field will be the same as the column name (without the prefix).
Since the list of fields is based on the columns in the database table, you can't delete a field from the list. If you want a given field not to appear on the entry editing screen, click the Ignore link beneath its name. The settings for the field will disappear (but RightFields will save them) and the link will change to Use. Click this to "de-ignore" the field.

Converting from PluginData to SQL
If you have RightFields data stored in PluginData but would like to convert it to SQL, first create one or more SQL tables according to the format described above. The datasource table for a given weblog must contain a column corresponding to each extra field for the weblog. For example, if you have PluginData extra fields called link1, link2, and link3, and your table is called mt_linkdata, it must have the columns linkdata_id, linkdata_link1, linkdata_link2, and linkdata_link3. The table can, however, have additional columns that do not correspond to any of the extra fields.
Once your tables are defined, click Convert extra fields from PluginData to SQL storage on the initial RightFields menu. You do not have to select a weblog first; this feature lets you convert multiple weblogs in one step.
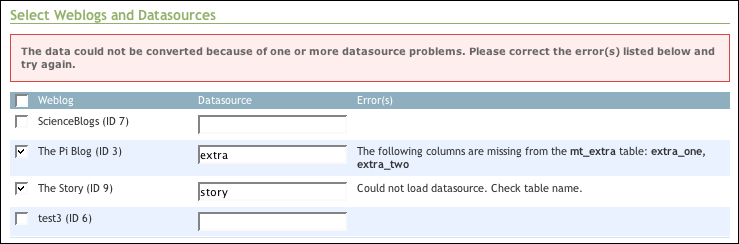
RightFields will identify any weblogs in your installation that have extra fields set up to be stored in PluginData. Check the boxes next to the blogs you wish to convert, and enter the table name(s), without the mt_ prefix (linkdata in the above example).
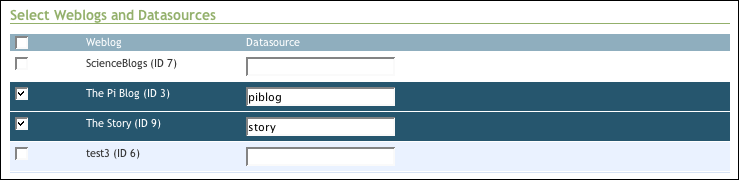
If one of your SQL tables is not defined properly, meaning it does not have columns that correspond to all the extra fields, RightFields will report which columns are missing. No data will be converted for any selected weblog, even one without errors, until all errors are corrected.
Disabling and Selectively Enabling RightFields
Above the list of Standard or Extra fields for a given weblog is a set of radio buttons that lets you turn RightFields on or off for the weblog, or turn it on for entries after a certain date and time.


By default, RightFields is Enabled for all weblogs. Standard field customization and extra fields can be disabled independently. To disable or selectively enable standard field customization or extra fields for a given weblog, select the appropriate radio button and click Save Changes.
If you disable standard field customization or extra fields for a given weblog, the field settings will be retained, but the field customization or extra fields will not appear on the entry editing screen for that weblog.
The Enabled for entries after option lets you enter a timestamp in the format YYYYMMDDhhmmss. (When you view the settings and this option is not selected, this will default to the current date and time.) With this option selected, when you create a new entry, or edit an existing entry with an Authored On timestamp later than the specified timestamp, the standard field customization or extra fields will appear on the entry editing screen. When you edit an entry with an Authored On timestamp earlier than or equal to the specified timestamp, the field customization or extra fields will not appear.
This is useful in cases where a weblog contains existing entries that use the standard entry fields, but you want to have a customized set of fields for future entries in the same weblog.
Field Types
Text
A Text field is a single-line enterable field.
You can configure the following settings:

- Width: The width of the input field, in pixels.
- Max. chars: The maximum number of characters that can be entered into the field. Note that this simply restricts the input length by adding a
maxlengthto the form element, and does not actually impose a limit on the database side (i.e., if an entry is created through other means).
Text area
A Text area field is a multi-line enterable field.
You can configure the following settings:
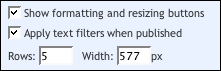
- Show formatting and resizing buttons: Controls whether MT's buttons for inserting HTML formatting into the field and changing the height of the field will be displayed.
- Apply text filters when published: Controls whether the text filters applicable to an entry, based on the entry's settings or weblog's default settings, will be applied when the field is displayed on a published page.
- Rows: The height, in rows of text, of the input field.
- Width: The width of the input field, in pixels.
If you customize the standard Entry Body or Extended Entry field as a Text area (which they are, by default), the text formatting buttons for the field will be retained. However, RightFields does not currently add formatting buttons to other fields you configure as Text areas.
Checkbox
A Checkbox field is an on-or-off checkbox. The field label is displayed to the right of the checkbox.

What is actually stored in the database is the value 1 or 0. If you convert an existing field to a checkbox, any value other than 0 in that field for an existing entry will cause the box to be checked when you edit the entry.
Date
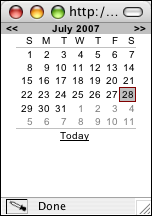
A Date field is a calendar date, which the user enters by selecting the year, month, day of the month, and (optionally) time of day from dropdown menus.

The user can also enter the date by clicking on a calendar icon and clicking on a date in a JavaScript-based popup calendar.
What is actually stored in the database is a timestamp string in the standard format used by MT: YYYYMMDDhhmmss. For example, 20051201182200 represents December 1st, 2005, at 6:22 PM.
A date field can be displayed in any desired format on a publishing template by using the MTFormatDate tag.
You can configure the following settings:
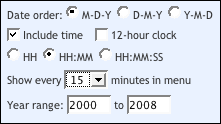
- Date order: The order in which the year, month, and day menus will appear on the entry editing screen. This does not affect the format of the stored timestamp value.
- Include time: Controls whether hour, minute, and second menus will appear on the entry editing screen. If this option is not selected, the stored timestamps will use
000000for the time. - 12-hour clock: If the time is included, lets you display a menu of 12 hours and an additional AM/PM menu.
- HH/HH:MM/HH:MM:SS: If the time is included, controls whether a menu for the hour, menus for the hour and minute, or menus for the hour, minute, and second will be displayed.
- Show every __ minutes in menu: If the time is included and a menu of minutes is displayed, lets you limit which minute options display in the menu. For example, selecting 15 will result in a menu containing 00, 15, 30, and 45.
- Year range: Controls which year options will appear in the dropdown menu of years.
File
A File field holds the name of an uploaded file. If the user has Upload File permission for the weblog being edited, a file upload field will be displayed along with the field.

If a filename is stored in the field when an existing entry is edited, RightFields will display the existing filename and a link to the file (relative to the URL path specified in the settings). If the file is an image (that is, if the filename has an image-type extension like .jpg or .gif), the image will be displayed.
If a file is uploaded and a filename is also entered into the field, that filename will be used. If the field is left blank, the uploaded file will be named according to the Filename setting, described below.
You can configure the following settings:
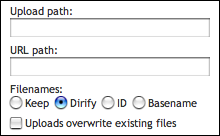
- Upload path: An absolute path to the location on your server where you want uploaded files to be stored. This might be something like
/home/myaccount/mysite.com/userfiles/pdfs. - URL path: The path relative to your site's web root, or a full URL and path, that will allow a web browser to display the uploded file. For example,
/userfiles/pdfs. This will be used in displaying and/or linking to the file on the entry editing screen, and by the MTFileURLPath tag. - Filenames: Controls how uploaded files will be named on the server. For all options except Keep, the name of the field, preceded by an underscore, will be inserted into the filename; this allows you to have multiple File type fields without naming conflicts.
- Keep means the filename will not be altered at all, except that a number will be appended if the file already exists and the Uploads overwrite existing files setting is not enabled. Since the name of an uploaded file can be very long, or irrelevant, or contain punctuation characters, this option is not recommended unless you're sure your users know what they're doing.
- Dirify means the existing filename will be used, but "dirified": punctuation will be removed, spaces converted to underscores, and the name will be lowercased. So
Mom's garden; Zinnias/dahlias.jpgwill becomemoms_garden_zinniasdahlias_field5.jpg. - ID means the filename will be based on the numeric ID of the entry being edited.
- Basename means the filename will be based on the basename of the entry being edited.
- Uploads overwrite existing files: If this option is checked, when an uploaded file (named according to the Filenames setting described above) already exists on the server, the existing file will be overwritten with the new file. If this option is not checked, a number will be added to the name of the new file so it has a unique name:
my_resume_1.pdfifmy_resume.pdfexists, or323_2.gifif323.gifand323_1.gifboth exist.
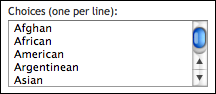
Select menu
A Select menu field is a dropdown menu from which the user can select an item.
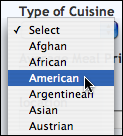
The Choices (one per line) setting controls what items will appear in the menu. You can define the choices as key/value pairs.
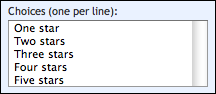
Radio buttons
A Radio buttons field is a set of radio buttons in which the user can click on a single item.

The Choices (one per line) setting controls what radio buttons will appear. You can define the choices as key/value pairs.
Key/value pairs
For Radio button and Select menu fields, you can define each choice presented to the user as a key/value pair, using the format key=value. The key will be stored in the database, but the value will be displayed to the user on the entry screen.
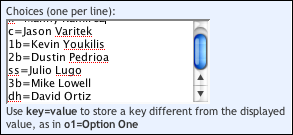
Without key/value pairs, if you change the text of a choice, the next time the user edits an entry with that choice selected, it will no longer be selected because the text stored in the database no longer matches. Using this feature lets you change the displayed values with impunity without worrying about existing entries.
Linked entry
A Linked entry field is a dropdown menu of entries in a weblog (either a different weblog or the same weblog where the field is defined) from which the user can select an entry. Information from the linked entry can be displayed on a publishing template using the MTLinkedEntry tag. Information about entries that are linked to a given entry can be displayed with the MTLinkingEntries tag.
What is actually stored in the database is the numeric ID of the selected entry.
You can configure the following settings:
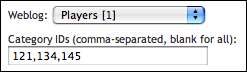
- Weblog: Lets you choose which weblog's entries will appear in the menu on the entry editing screen.
- Category IDs: If you want to restrict which entries will appear in the menu, you can enter one or more IDs of categories from the linked weblog in this field. If category IDs are entered here, only entries assigned to these categories will appear in the menu of entries to link to.
Defining Default Values
To set default values that will appear in any standard or extra field when a user creates a new entry in a given weblog, use the Defaults tab. You'll see a screen that resembles the entry editing form itself, where you can type in or select (depending on the field type) a default value for each field.
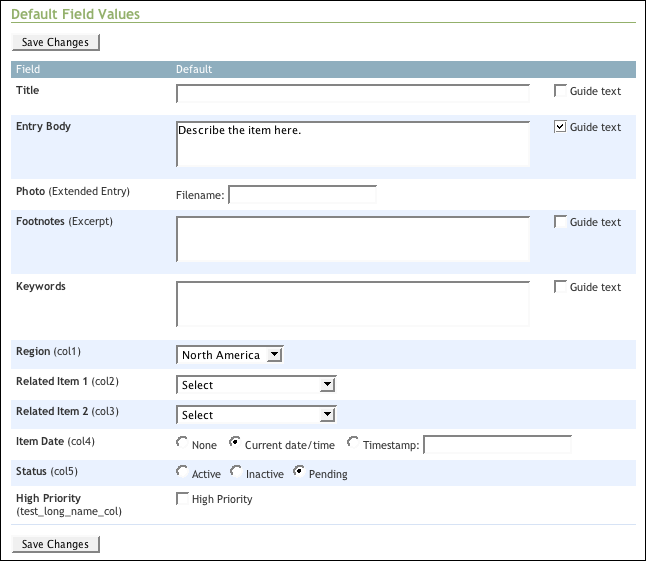
For a Text or Text area field, you have the option to make the default text Guide text. This means that the text will appear in the field when the user creates an entry, but will disappear as soon as the user clicks in the field. You can use this feature to display instructions about what should be entered in the field. (Note that for the Title field, this doesn't work so well, because the cursor is moved to the Title field as soon as the entry page loads, blanking out the guide text.)
Defining Custom Template Tags
If you're using the Keywords field to store an event venue, or using a generically named database column to store a hat size, it's confusing to have to use <$MTEntryKeywords$> and <$MTExtraFieldValue field="col9"$> to display these elements on your publishing templates. RightFields lets you define custom template tags, so you can use <$MTEntryEventVenue$> or <$MTHatSize$> instead.
This feature does not work if you're using dynamic publishing. The template tags are defined "on the fly" in such a way that they will only work with statically built templates. Sorry.
Also, you can't use this feature for Linked entry type fields, because the tag used to display them, MTLinkedEntry, is a container tag, and, well, it just didn't work out.
When you click on the Template Tags tab for a particular weblog, you'll see a listing with three blank fields for creating new template tags. Three blanks will always be displayed, so to add more than three, add them three at a time.
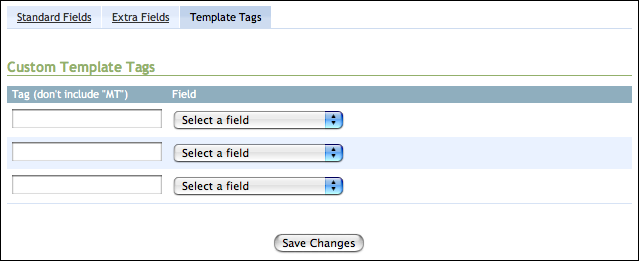
The name you enter for a custom tag should omit the MT prefix. It's probably best to follow MT's tag naming convention, which is to use what we geeks somehow find it reasonable to call UpperCamelCase. You may also want to start your tag names with Entry, since they will display entry-related information. (However, RightFields' own tags ignore this suggestion completely, so who am I to judge?)
After entering a name for a tag, select the field you want the tag to display.
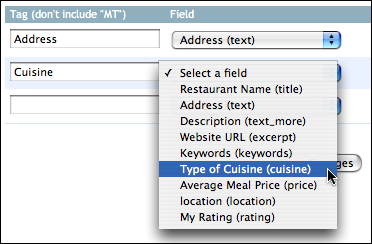
The menu of fields shows the labels and (in parentheses) field names of the standard entry fields and any extra fields you've defined. Then click Save Changes to save the tags. After the tags are saved, you can use them on your templates. Remember that the custom tags will only work on templates for the particular weblog you're configuring.
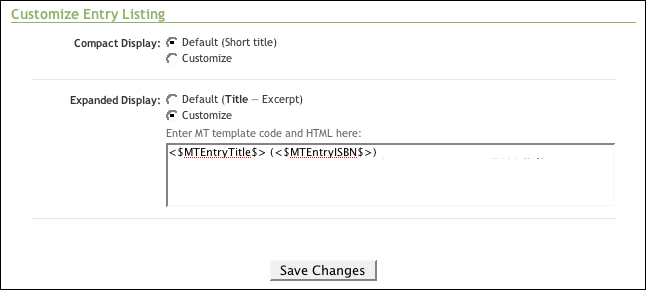
Configuring the Entry Listing
If you've customized the standard fields or have important information stored in extra fields, the normal MT entry listing, which normally shows each entry's title and (in Expanded mode) excerpt, may not display the data you need to tell your entries apart or the fields you want to be able to see at a glance for multiple entries. To control what appears in the entry listing for a given weblog, click the Entry Listing tab.
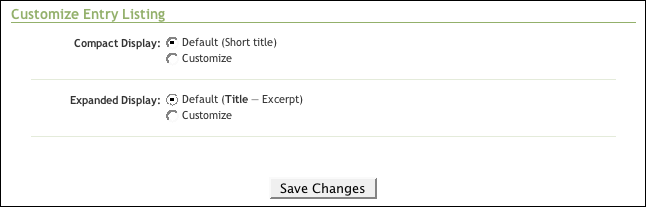
To customize the listing for either Compact Display or Expanded Display mode, select the corresponding Customize radio button. A field will appear letting you enter MT template code. Within this field, you can use any tags you'd use in the context of an entry. (You don't need to use MTExtraFields here to load the extra field information.)
Plugin Template Tags
These tags allow you to display the extra fields you've defined, and some additional information for particular types of fields.
Some of the tags expect a field name to be passed.
- For extra fields stored in a SQL table, use the name of the database column, minus the
datasource_prefix—the same way the field name is displayed on the Extra Fields configuration screen. - For extra fields stored in PluginData, use the field name (not the label) as you've defined it on the Extra Fields configuration screen.
- For customized standard fields, use one of the following values:
- Title:
title - Entry Body:
text - Extended Entry:
text_more - Excerpt:
excerpt - Keywords:
keywords
- Title:
The following example shows how you might display the custom fields defined in the restaurants example above:
<MTEntries>
<p><$MTEntryTitle$><br>
<$MTEntryBody$>
<MTExtraFields>
<MTIfExtraFields>
<p>ADDITIONAL INFORMATION:<br>
<MTIfExtraField field="location">
Location: <$MTExtraFieldValue field="location"><br>
</MTIfExtraField>
<MTIfExtraField field="cuisine">
Type of Cuisine: <$MTExtraFieldValue field="cuisine"><br>
</MTIfExtraField>
<MTIfExtraField field="price">
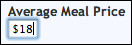
Average Meal Price: <$MTExtraFieldValue field="price"><br>
</MTIfExtraField>
<MTIfExtraField field="rating">
My Rating: <$MTExtraFieldValue field="rating"> of 4 stars<br>
</MTIfExtraField>
</MTIfExtraFields>
</MTExtraFields>
</MTEntries>
MTExtraFields
This container tag loads the custom field data for the current entry. All the other ExtraFields tags must be contained within this tag.
MTIfExtraFields
This container tag displays its contents if two conditions are met: A) you've defined extra fields for this weblog, and B) there is data entered in at least one of the extra fields for the current entry. Otherwise, it displays nothing.
The tag takes the following attribute:
- fields="fieldname1 fieldname2" (optional)
The names of one or more fields, separated by a space. If you pass this attribute, the tag will display its contents only if one of the named fields contains something for the current entry.
MTIfExtraField
This container tag prints its contents if there is data entered in the specified extra field for the current entry.
The tag takes the following attribute:
- field="fieldname" (required, unless looping)
The name of the extra field to be checked for data.
MTExtraFieldsLoop
This container tag loops through all the extra fields that have been defined for this weblog, printing its contents once for each field. Within the loop, MTIfExtraField, MTExtraFieldValue, and MTFieldLabel refer to the field in the current loop iteration.
The following example will display the custom data for the restaurant example, but without having to specify the individual fields:
<MTEntries>
 <p><$MTEntryTitle$><br>
 <$MTEntryBody$>
 <MTExtraFields>
  <MTIfExtraFields>
   <p>ADDITIONAL INFORMATION:<br>
   <MTExtraFieldsLoop>
    <MTIfExtraField>
     <$MTFieldLabel$>: <$MTExtraFieldValue$><br>
    </MTIfExtraField>
   </MTExtraFieldsLoop>
  </MTIfExtraFields>
 </MTExtraFields>
</MTEntries>
MTExtraFieldValue
This tag displays the value of the specified extra field—that is, it displays whatever data you've entered into the field for the current entry.
If you're using key/value pairs for a choice field, this tag will automatically display the value unless you pass show_key="1".
The tag takes the following attributes:
- field="fieldname" (required, unless looping)
The name of the extra field whose value should be displayed. - show_key="1" (optional)
Tells the tag to display the key instead of the value for a field for which you're using key/value pairs.
MTFieldValue
If you're using key/value pairs for choices in a customized standard field, the tag that normally displays that field will display the key (which is what's stored in the database). You can use this tag to display the value. For example, if you're using the Keywords field for a select menu:
<$MTFieldValue field="keywords"$>
The tag takes the following attributes:
- field="fieldname" (required)
The name of the field whose value should be displayed. - show_key="1" (optional)
Tells the tag to display the key instead of the value.
MTFieldKey
Equivalent to using either MTExtraFieldValue or MTFieldValue with show_key="1".
The tag takes the following attributes:
- field="fieldname" (required)
The name of the field whose value should be displayed.
MTFieldLabel
This tag displays the label for the specified extra field or customized standard field. (For backward compatibility with ExtraFields, MTExtraFieldLabel is synonymous with this tag.)
The tag takes the following attribute:
- field="fieldname" (required, unless looping)
The name of the field whose label will be displayed.
MTFileURLPath
Given the name of a field defined as a File type, this tag displays the text specified in the field's URL path configuration setting. In conjunction with the field's value, it can be used to link to or display the file:
<a href="<$MTFileURLPath field="resume"$>/<$MTExtraFieldValue field="resume">">Download Resume</a>
The tag always displays the path without a trailing slash, so you can include a slash between the path and the filename on a template without worrying about which way it was entered in the configuration.
The tag takes the following attribute:
- field="fieldname" (required)
The name of the field whose label will be displayed.
MTLinkedEntry
Given the name of a field defined as a Linked entry type, if a linked entry was selected for the entry currently being displayed, this container tag loads the linked entry. Use any of the standard entry-related tags within this tag to display its information.
For example, let's say you have a weblog called Events and one called Venues, whose fields are customized as follows:
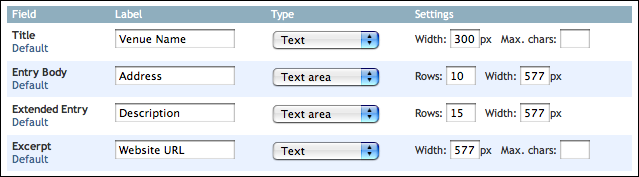
In the RightFields configuration for Events, you define the Keywords field to be a Linked entry from Venues. Here's how you would display an event along with information about the linked venue:
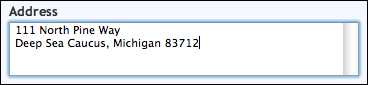
<!--we're in an Events template-->
<MTEntries>
 <p>Event Name: <$MTEntryTitle$><br />
 Description: <$MTEntryBody$><br />
 Date: <$MTEntryMore$></p>
 <MTLinkedEntry field="keywords">
  <p>Venue: <a href="<$MTEntryExcerpt$>"><$MTEntryTitle$></a><br />
  Address: <$MTEntryBody$><br />
  Description: <$MTEntryMore$></p>
 </MTLinkedEntry>
 </p>
</MTEntries>
MTIfLinkingEntries
In the context of a weblog (Weblog A) to which a Linked entry field in one or more other weblogs (Weblogs B, B1, B2...) is linked, this conditional tag will display its contents if and only if one or more entries in the specified weblogs is linked to the current Weblog A entry.
The tag takes the following attributes:
- blog_ids="id,id_1,id_2..."
The IDs of one or more weblogs from which entries are linked to Weblog A. If this is not passed, the tag will check for linking entries from all weblogs in the system. - field="fieldname" (required)
The name of the Linked entry field in Weblogs B, B1, B2...
MTLinkingEntries
In the context of a weblog (Weblog A) to which a Linked entry field in one or more other weblogs (Weblogs B, B1, B2...) is linked, this container tag will load all the entries in the specified weblogs that are linked to the current Weblog A entry. (A and B can be the same weblog.)
If the field in question is an Extra field, you must be using SQL data storage in order to use this tag. It is not currently supported for extra fields using PluginData data storage.
The tag will display its contents once for each linking entry. Within this tag, you can use any entry-related tags as if you were in an MTEntries container.
The tag takes the following attributes:
- blog_ids="id,id_1,id_2..."
The IDs of one or more weblogs from which entries are linked to Weblog A. If this is not passed, linking entries from all weblogs in the system will be displayed. - field="fieldname" (required)
The name of the Linked entry field in Weblogs B, B1, B2... - sort_by="fieldname"
The name of the entry field to sort the linking entries by. - sort_order="ascend|descend"
Whether to display the linking entries in ascending or descending order.
In the Events/Venues example above, here's how you would display the venues along with the events at each venue:
<!--we're in a Venues template-->
<MTEntries>
 <p>Venue: <a href="<$MTEntryExcerpt$>"><$MTEntryTitle$></a><br />
 Address: <$MTEntryBody$><br />
 Description: <$MTEntryMore$></p>
 <MTIfLinkingEntries field="keywords">
  <p>Events at <$MTEntryTitle$>:</p>
  <MTLinkingEntries blog_id="2" field="keywords">
   <p>Event Name: <$MTEntryTitle$><br />
   Description: <$MTEntryBody$><br />
   Date: <$MTEntryMore$></p>
  </MTLinkingEntries>
 </MTIfLinkingEntries>
</MTEntries>
MTFormatDate
This container tag assumes that its contents are a timestamp in the format YYYYMMDDhhmmss, the format used by RightFields to store Date type fields. You can format the date by passing the same format and language attributes to MTFormatDate that you would pass to MTEntryDate or any other MT date tag.
MTFormatDate ignores any whitespace at the beginning or end of its contents.
Expiration Date:
<MTFormatDate format="%m/%d/%Y">
 <$MTExtraFieldValue field="expiration"$>
</MTFormatDate>
Version History
8/8/07 - version 1.21
- Fixed a bug with Date field menus not showing the proper selection (Komra Moriko).
- Fixed a rebuild bug with MTEntries (Gurunandan).
7/28/07 - version 1.2
- Lots of changes; see this blog entry and this forum topic for more details.
12/6/06 - version 1.13
- Fixed another bug with extra File type fields (drritalin).
- Fixed navigation problem after hitting Cancel in RightFields interface.
8/24/06 - version 1.12
- Fixed bug with extra File type fields introduced in 1.11 (jwilker).
8/23/06 - version 1.11
- Fixed bug where RightFields settings could get deleted when deleting an entry with extra fields containing no data (Shisei, Ian Fenn).
- Data after quotation marks no longer truncated in Text fields (Armin Dressler/Oliver Havlat).
7/12/06 - version 1.1
- Updated code for MT 3.3.
- Added Default Settings feature.
- Added Delete Settings feature
- Added Category IDs option to Linked Entry field type.
- Many enhancements to MTLinkingEntries tag.
- Added MTIfLinkingEntries tag.
- Added "Show formatting and resizing buttons" option to Text Area field type.
- Data in extra fields is now included in MT's public search.
- Miscellaneous bug fixes.
2/10/06 - version 1.02
- The change in 1.01 broke something else. (almuhajabah)
- Fixed column label on Template Tags config page. (Neil lee)
2/9/06 - version 1.01
- It was broken if you didn't have both standard and extra field customization for a weblog. Duh. (Ian Fenn)
2/8/06 - version 1.0
- Names of uploaded files now have field name appended (to avoid conflicts if there are multiple file fields).
- Added option to disable customization for both standard and extra fields for a given weblog.
- Added option to apply customization only to entries after a certain timestamp for both standard and extra fields for a certain weblog.
- Fixed tab indexes for all field types.
- Fixed bug where customizing standard fields caused Authored On field and Allow Comments/Trackbacks checkboxes to display their values improperly.
- Moved most code from RightFields.pl to RightFields.pm for faster loading when the code is not actually needed on a given call to mt.cgi.
- Text displayed on configuration screens is now wrapped in MT_TRANS tags for potential internationalization.
- Field names of extra fields (when storing in PluginData) are now validated to contain only letters, numbers, and underscores, and prevent duplicate names.
- MTIfExtraFields now takes an optional "fields" attribute.
12/6/05 - version 1.0b1
